Choosing the Right Jeans
Selecting the perfect pair of jeans is the first critical step in learning how to make ripped jeans. The type and fit of the jeans can majorly influence the final look. Here are some tips for choosing the right jeans:
- Fabric Quality: Opt for jeans made from sturdy denim. High-quality denim holds the rips better and prevents them from expanding undesirably.
- Fit: Choose a fit that compliments your body shape. While skinny jeans are popular for ripping, straight-leg or boyfriend jeans also make excellent choices depending on your style preference.
- Color and Wash: Lighter colors and washed denim typically show rips and tears more prominently, making them ideal for this project.
- Age of Jeans: Consider using a pair you already own and don’t mind altering. Older jeans are not just cost-effective but sometimes easier to rip due to their worn fabric.
Ensure the jeans fit well and are comfortable, as you’ll be working with them in various positions while creating the rips.
 Tools and Materials Needed for Ripping Jeans
To embark on your journey on how to make ripped jeans, gather the necessary tools and materials first. You’ll need a few simple items:
- Sharp Scissors: A pair of sharp fabric scissors ensures clean cuts and controlled ripping.
- Tweezers: Use tweezers to pull out threads for a frayed effect around the rips.
- Chalk or Fabric Marker: These help in marking out the areas you want to rip, providing a guide before you start cutting.
- Ruler or Tape Measure: Precision is key, so use a ruler or tape measure for consistent rip lengths.
- Cardboard or Magazine: Insert this inside the leg to avoid cutting through to the other side.
- Sandpaper or Cheese Grater: To add a distressed look around the rips, use sandpaper or a cheese grater lightly over the area.
Before you begin the ripping process, organize your workspace. Ensure that you have a flat, sturdy surface to lay the jeans on. Having all materials within reach makes the process smoother and more efficient. With your tools ready, you’re set to move on to planning the style of rips and tears for your jeans.
Deciding on the Style of Rips and Tears
Now that you have your jeans and tools ready, it’s time to choose the style of rips and tears you want for your DIY ripped jeans. This is where you can get creative and personalize your denim to reflect your style. Here are some decisions to consider:
- Placement: Decide where you want the rips. Common areas include the knees, thighs, or near the pockets.
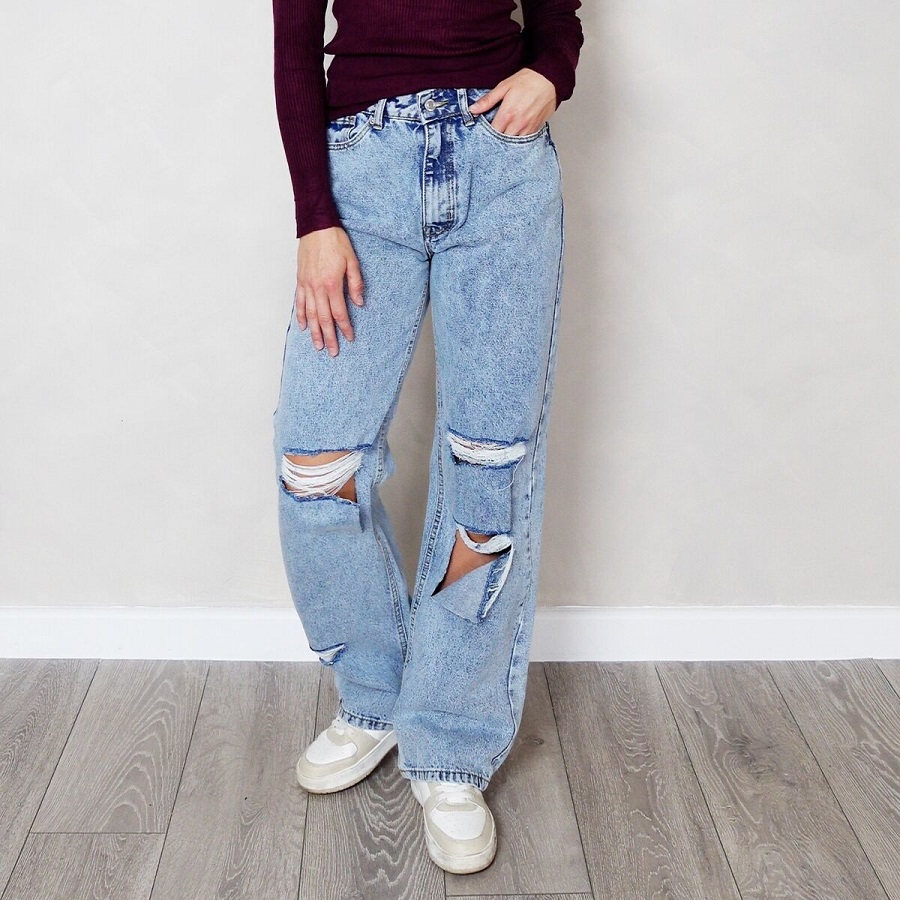
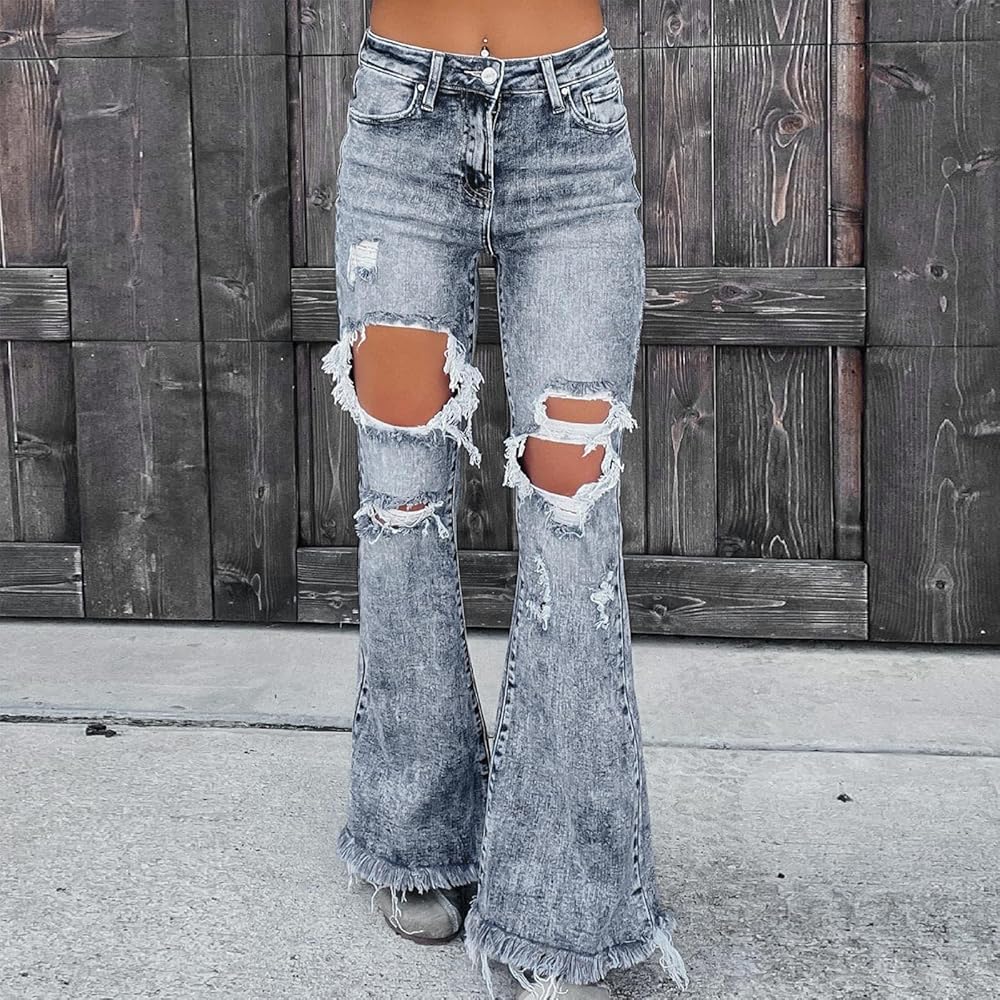
- Size and Shape: Do you want large knee holes, small slashes, or a combination of both? The size and shape of the rips will affect the overall look.
- Intensity of Distress: Determine how intense you want the distress to look. Subtle frays can be as striking as extreme tears.
- Symmetry: While asymmetrical rips can appear more natural, symmetrical tears offer a more polished aesthetic.
- Thematic Touches: Consider adding thematic rips, like horizontal lines for a biker look or random patterns for a grunge effect.
- Trending Styles: Keep an eye on current fashion trends. This can inspire your ripped jeans design.
Remember, when deciding on the style of your rips and tears, always keep in mind how to make ripped jeans that complement your body shape and personal fashion sense. Take your time with this step, as it will guide the ripping process and ensure you end up with a pair of jeans that you’ll love and feel confident wearing.
Step-by-Step Process of Ripping Jeans
Ready to bring your creative ideas to life? Follow this easy, step-by-step guide on how to make ripped jeans.
- Mark the Areas: Put on your jeans and with chalk or a fabric marker, mark where you want your rips to be. It’s best to do this while wearing them for better placement accuracy.
- Insert Cardboard: Slip a piece of cardboard inside the leg to avoid cutting through the opposite side. This step is crucial for a controlled rip.
- Start Cutting: Using your sharp scissors, cut horizontally across the marked lines. Remember, clean cuts are better for a polished look.
- Fray the Edges: Gently use tweezers to fray the edges of the cuts. This will create a more natural, distressed look.
- Distress the Denim: For additional texture, lightly rub the area around the rips with sandpaper or a cheese grater.
- Check the Fit: Try the jeans on again to ensure the rips are in the right places and look the way you envisioned.
- Wash the Jeans: Finally, wash your newly ripped jeans to further fray the cuts and complete the distressed look. Be sure to use a gentle cycle.
Repeat the process as needed to add more rips or to adjust the current ones until you achieve the desired effect. Remember, when learning how to make ripped jeans, practice makes perfect—so don’t worry if it takes a few tries to get it right.
Tips for Washing and Maintaining Ripped Jeans
After you learn how to make ripped jeans, the next important step is to maintain them properly. Keeping the awesome look of your distressed jeans requires careful washing and handling. Here are tips to keep them in great shape:
- Wash Gently: Always use a gentle cycle and cold water to prevent further ripping and to conserve the fabric’s texture.
- Turn Inside Out: Before washing, turn your jeans inside out. This protects the rips and reduces the chance of fraying.
- Use a Laundry Bag: Place your ripped jeans in a laundry bag or pillowcase. This helps to minimize stress on the distressed areas during the wash.
- Avoid Bleach: Bleach can weaken denim fibers and cause more tearing. Steer clear of it to prolong the life of your jeans.
- Skip the Dryer: Air dry your jeans by laying them flat or hanging them up. The heat from a dryer can damage and shrink the ripped portions.
- Handle with Care: When putting on or taking off your jeans, do so gently. Excessive pulling can make the rips larger.
- Routine Checks: Regularly inspect your jeans for any signs that the rips may be expanding. If so, make small repairs to prevent further damage.
By following these simple tips, you can ensure that your DIY ripped jeans remain a fashionable and durable part of your wardrobe. Remember, the key to making your ripped jeans last is as much in the aftercare as it is in the creation process.
Creative Ideas for Personalizing Your Ripped Jeans
Creating unique ripped jeans is all about adding a personal touch. Here are some creative ways to make your jeans truly one of a kind:
- Use Fabric Paint: Dab or draw designs around the rips with fabric paint. This adds color and uniqueness.
- Attach Patches: Sew on patches of various shapes, sizes, or patterns. They look cool and can cover larger holes.
- Incorporate Embroidery: Hand stitch or use iron-on embroidery for a crafty flair. Floral designs are quite popular.
- Add Studs or Gems: Press studs or glue on gems to the jeans for a bit of sparkle and edge.
- Dye Your Jeans: Try tie-dye or dip-dye techniques for a bold color transformation.
- Bleach Art: Use bleach to create patterns or lighten certain areas, but do so carefully.
- Layer Tights: Wear colorful or patterned tights underneath to show through larger tears.
Remember to space out the customizations to avoid a cluttered look. Each addition should complement the others. Most importantly, have fun with the process of learning how to make ripped jeans that express your style. Keep experimenting until your jeans become a statement piece in your wardrobe.
How to Avoid Common Mistakes When Making Ripped Jeans
When venturing into how to make ripped jeans, some errors can spoil your hard work. Avoid these common mistakes to ensure your DIY project is a success:
- Over-Ripping: It’s exciting to tear into denim, but too much can ruin the look. Start small; you can always add more.
- Bad Placement: Rips placed in unflattering spots can draw unwanted attention. Try on the jeans and mark areas while standing and sitting.
- Ignoring Grain: Denim has a grain line. Cut parallel to it for a natural tear appearance.
- Skipping Measurements: Eyeballing might lead to uneven tears. Use a ruler for equal distance between rips.
- Forgetting to Secure Threads: After cutting, secure loose threads with a needle and thread to prevent further unravelling.
- Uneven Distressing: Uniform distressing can look artificial. Vary the pressure and direction when using sandpaper.
- Neglecting Aftercare: Wash and dry your jeans properly to maintain the rips. Follow the maintenance tips shared earlier.
Keeping these pointers in mind while learning how to make ripped jeans will help you achieve the trendy look without the mishaps.
Ways to Style Ripped Jeans for Different Occasions
Ripped jeans can be versatile in your wardrobe, adapting to various settings with ease. Here are effective ways to style them:
- Casual Outings: Pair your jeans with a simple tee or tank top for a relaxed look. Add sneakers or flats to keep it comfy.
- Evening Events: Dress them up with a sleek blazer or a chic blouse and heels for a more formal touch.
- Workplace Casual: Combine ripped jeans with a button-up shirt and loafers. Choose less distressed styles for a professional edge.
- Street Style: Embrace the edge with a leather jacket and boots. A graphic tee adds to the urban vibe.
- Layered Looks: For cooler weather, sweaters and scarves make great additions. They provide warmth while staying stylish.
- Summer Vibes: Opt for ripped shorts with breezy tops and sandals. It’s perfect for beach days or picnics.
Remember, the key to styling ripped jeans is balance. Mix textures and layers to keep your look interesting but not overdone. Your ripped jeans can be a statement piece, so let them stand out while coordinating with the rest of your attire.
